
Step by step installation of Android 8.0 Oreo for Pixel and Nexus

Google has released factory system images of the much awaited Android 8.0 Oreo update for compatible devices.


Android Oreo for Pixel and Nexus

Google has started to roll out the final version which should be soon available to compatible devices. However, it does take some time before you receive the over the air notification. Google said that for now it’s pushing the AOSP update for its OEM partners.
Android Oreo system images are now available on the developers' site. 
The system images are available for compatible devices: 
Nexus 5X
Nexus 6P
Nexus Player,
 Pixel C
Google Pixel
and Google Pixel XL users. 
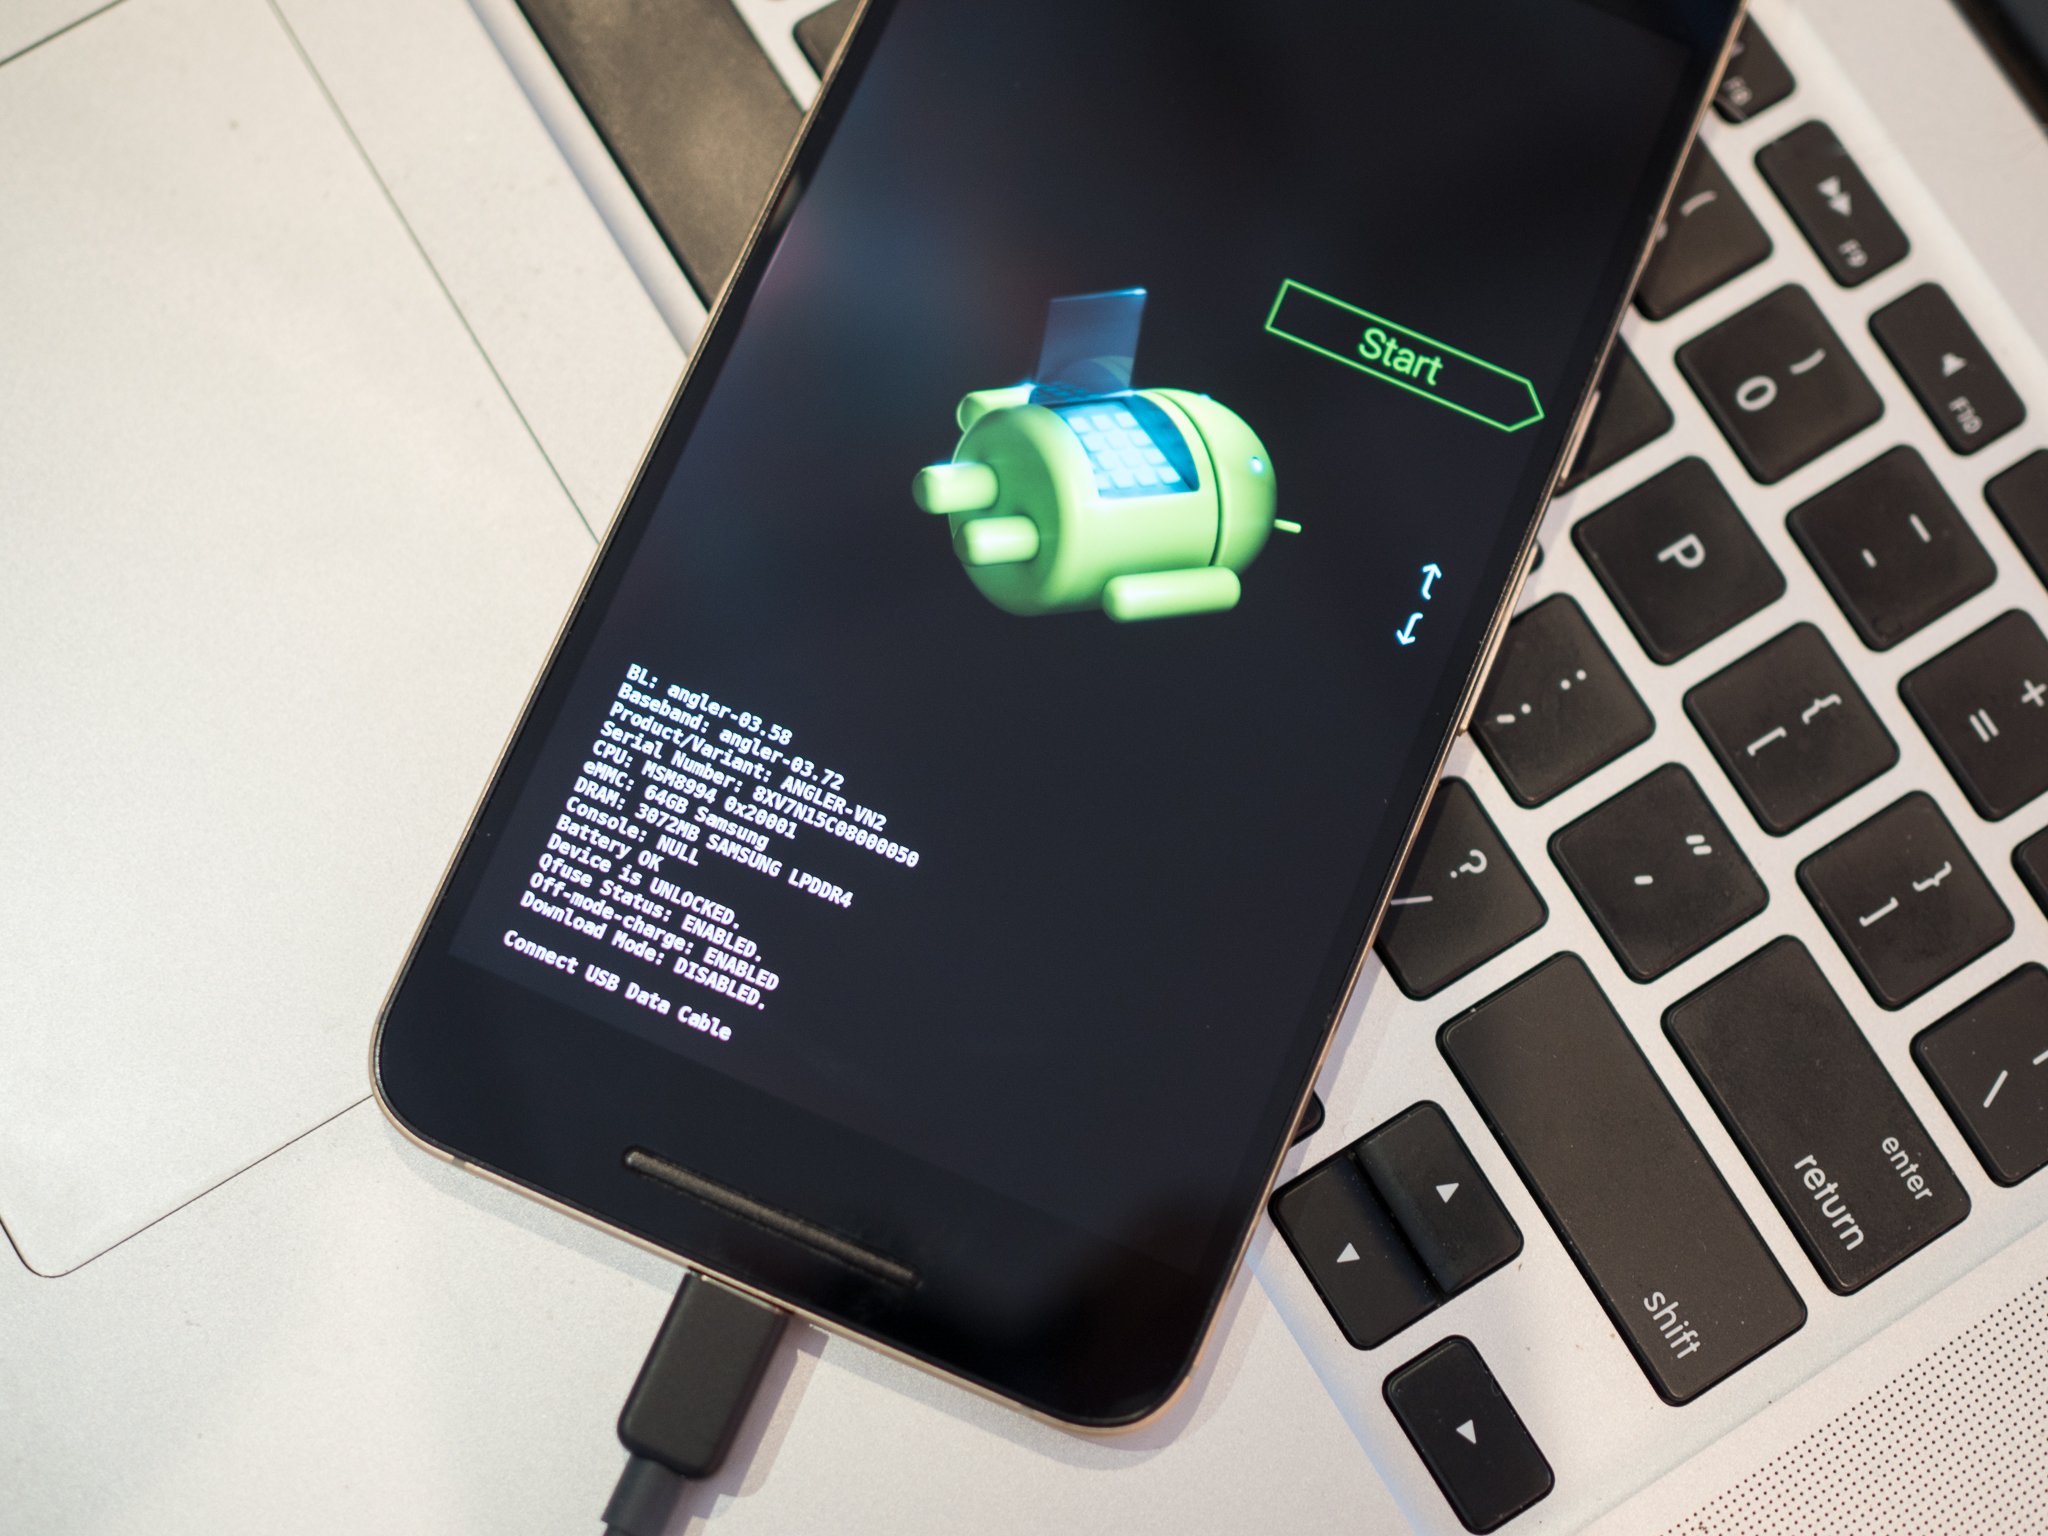
You need to ensure that you have an unlocked bootloader and ADB running on your computer before installing. All your data will be removed while installing system images, so ensure that you backup beforehand.

Steps to install OS:

  1. Download the appropriate system image for your device below, then unzip it to a safe directory.  [ https://developer.android.com/about/versions/o/download.html#flash ]
  2. Connect your device to your computer over USB.
  3. Start the device in fastboot mode with one of the following methods:    

> Go to folder platform-tools in your system

make sure you downloaded new version of platform-tools  

 https://developer.android.com/studio/releases/platform-tools.html

>  copy paste command by replacing SDK path

fastboot flashing unlock

export PATH=/Users/sujayabraham/sujay/android-sdk-macosx/platform-tools:$PATH


Now run ads command
adb reboot bootloader


4. If necessary, unlock the device's bootloader using one of the following methods:
If you are updating a Nexus 5X or Nexus 6P device using the bullhead or angler builds, update your fastboot tool to the latest available version (>=23.0.1), and then run this command:
fastboot flashing unlock
  1. The target device will show you a confirmation screen. (This erases all data on the target device.)
    See Unlocking the bootloader for more detailed instructions.
  2. Open a terminal and navigate to the unzipped system image directory.
  3. Execute the flash-all script. This script installs the necessary bootloader, baseband firmware(s), and operating system.
flash-all.sh
This will install the images.

for queries:


Thank you


Comments

Popular posts from this blog

Short explanation on Gradle, minSdkVersion, maxSdkVersion, compileSdkVersion and targetSdkVersion in Android

Gradle : The Android build system compiles app resources and source code, and packages them into APKs that you can test, deploy, sign, and distribute. Android Studio uses Gradle . The Android plugin for Gradle works with the build toolkit to provide processes and configurable settings that are specific to building and testing Android applications. Gradle and the Android plugin run independent of Android Studio. Gradle architecture is shown below. Example: android { compileSdkVersion 27 buildToolsVersion “26.0.2” defaultConfig { applicationId “com.example.checkyourtargetsdk" minSdkVersion 15 targetSdkVersion 27 versionCode 1 versionName “1.0” } } minSdkVersion : minSdkVersion is the lower bound for your app . The minSdkVersion is one of the signals the Google Play Store uses to determine which of a user’s devices an app can be installed on.  your app’s minSdkVersion must be at least as high as your dependencies’ minSdkVe

Google re-branded the support Android libraries to AndroidX

It is important to note, you cannot mix AppCompat and Jetpack in the same project. You must convert everything to use Jetpack if you want to upgrade. The support library artifacts are being deprecated and all future development is going into AndroidX , so there's no avoiding this migration. Alan Viverette sums this up nicely: “There won’t be a 29.0.0, so Android Q APIs will only be in AndroidX” The stable release of 28.0.0 will be the final feature release packaged as android.support . All subsequent feature releases will only be made available as androidx-packaged artifacts. Below tips will give you a clearer transition path. The current version of AppCompat (v28.x) is exactly the same as AndroidX (v1.x). In fact, the AppCompat libraries are machine generated by changing maven coordinates and package names of the AndroidX codebase. For example, android.support.v7.app.AppCompatActivity is now androidx.appcompat.app.AppCompatActivity For a complete listi

Android Beginners Guide

                                                                                                               Android Operation System: Android is an operating system based on Linux with a Java programming interface. It provides tools, e.g. a compiler, debugger and a device emulator as well as its own Java Virtual machine (Dalvik Virtual Machine - DVM). Android is created by the Open Handset Alliance which is lead by Google. Android uses a special virtual machine, e.g. the Dalvik Virtual Machine. Dalvik uses special bytecode. Therefore you cannot run standard Java bytecode on Android. Android provides a tool "dx" which allows to convert Java Class files into "dex" (Dalvik Executable) files. Android applications are packed into an .apk (Android Package) file by the program "aapt" (Android Asset Packaging Tool) To simplify development Google provides the Android Development Tools (ADT) for Eclipse. The ADT performs automatically the conversion f